
Concept Board
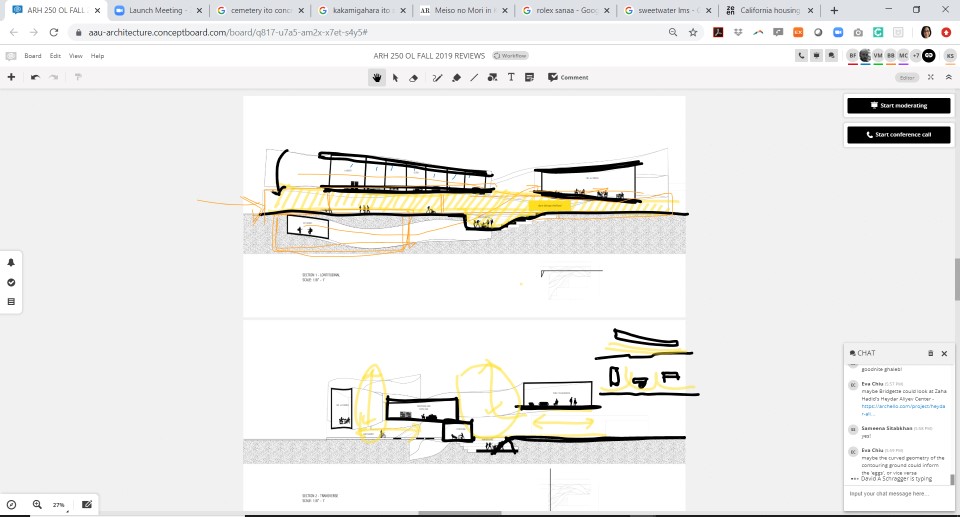
Building a studio culture in a virtual class room requires additional effort, empathy, time, and most importantly, a “shared space.” Concept Board is a virtual shared space that facilitates desk crits. The drawing and commenting tools in Concept Board, whether used alone asynchronously or synchronously during Zoom calls, approximate the in-person desk crit sessions of faculty and student drawing together on the same drawing.
The School of Architecture has a paid subscription to Concept Board. There is no additional cost to faculty and students. It is a web-based service (no apps to download or update) with sketching tools, text-based commenting functions, and the ability to send notifications to specific students. Guest critics can join reviews without registering.
Concept Board Tool Bar
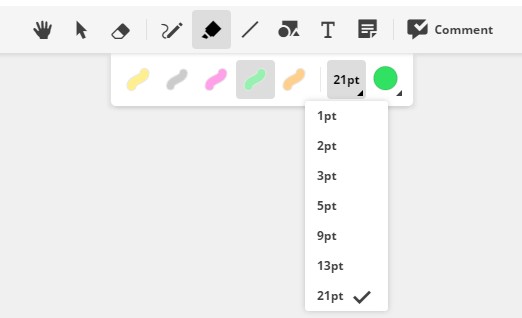
Concept Board has tools with which to comment on drawings and images. Scribble, Highlight, Line, Shape, Text, and Comment are the most commonly used.
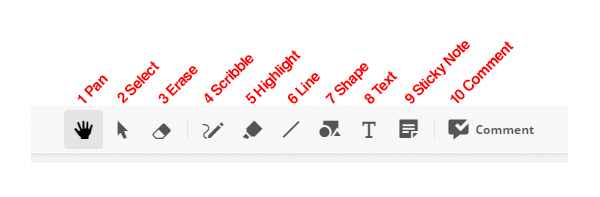
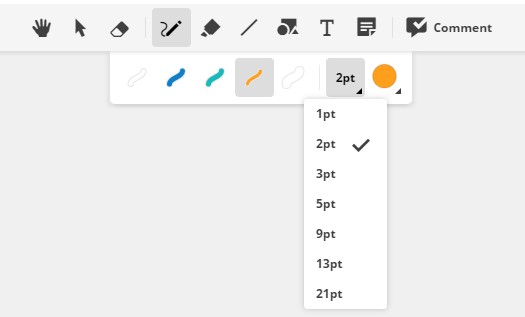
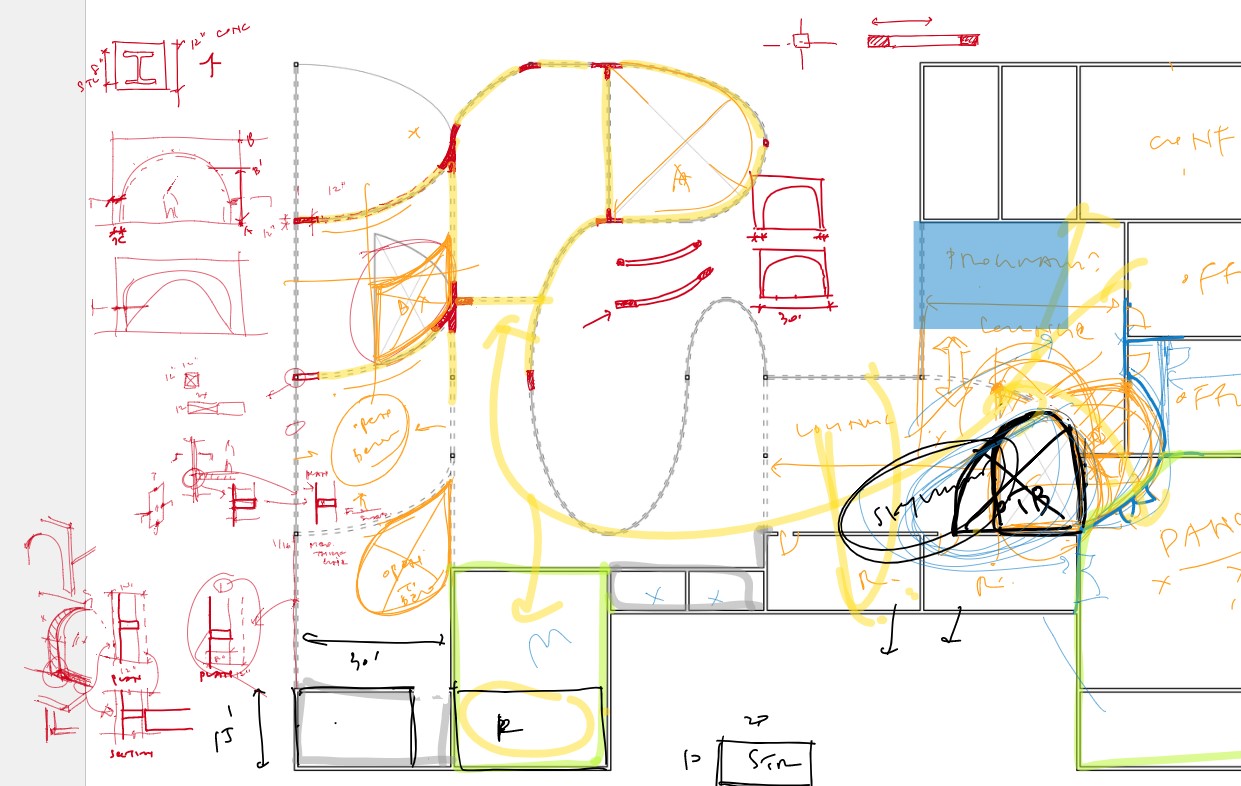
Scribble
For freehand drawing. You can draw simple shapes with a mouse but this tool works better with a stylus or on a tablet. Different line weight and color options make drawings legible. Some examples are below.
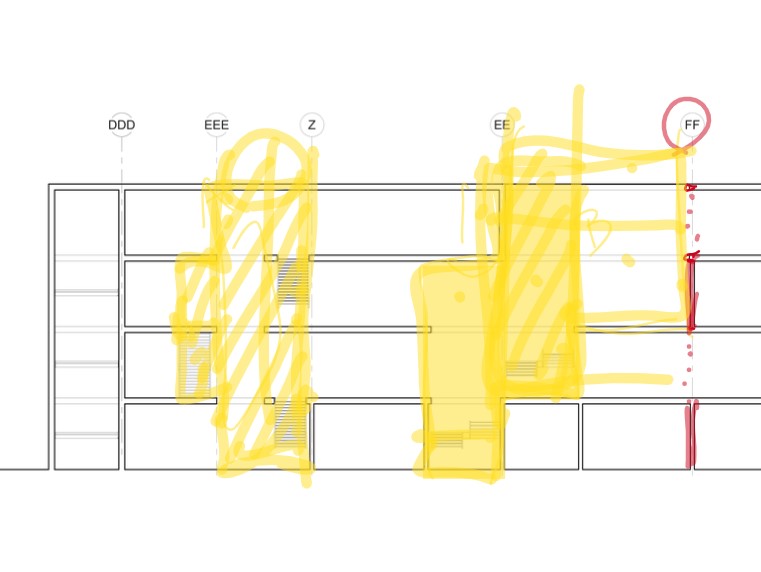
Highlight
Similar to an actual highlighter, makes thick lines that are see-through. Different line weights and color options available. Example below.
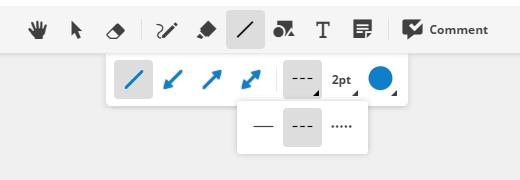
Line
Select two points to draw a straight line. Dashed lines and different line weights are useful for diagramming.
Shape
Draw preset shapes and assign opaque, translucent, or transparent fill options.
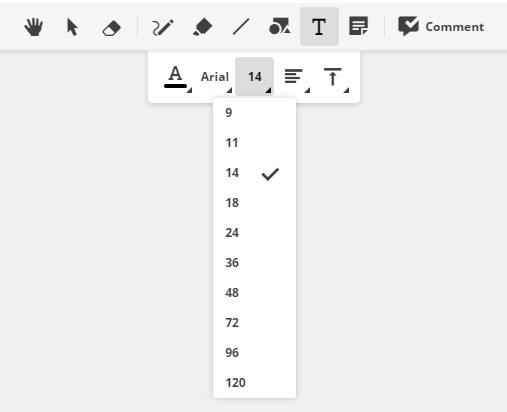
Text
Keep in mind that the largest font size is 120 pt. This font size will be very small when zoomed out to see the extents of a large image.
Comment
The Comment tool is also a useful notification tool. It keeps track of the author, adds a time stamp, and sends a notification (via email) to recipients. Click on “Add a User” to alert recipients.

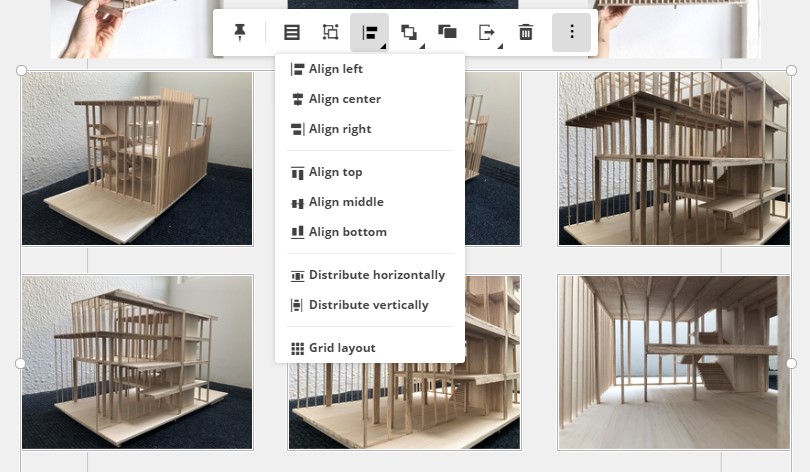
Additional Options
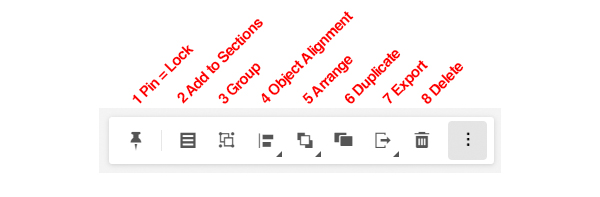
When an object is selected, a menu bar becomes visible. Use Pin to lock objects so that they can’t be accidentally moved.
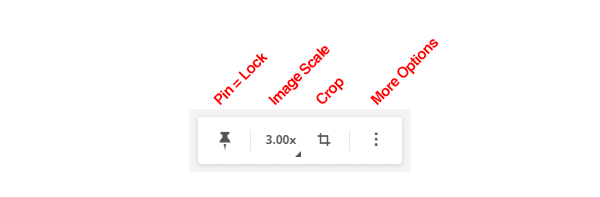
Crop images without changing the original.
When one or more object is selected, additional options become available. Group multiple objects together. Arrange to determine which object is in front.
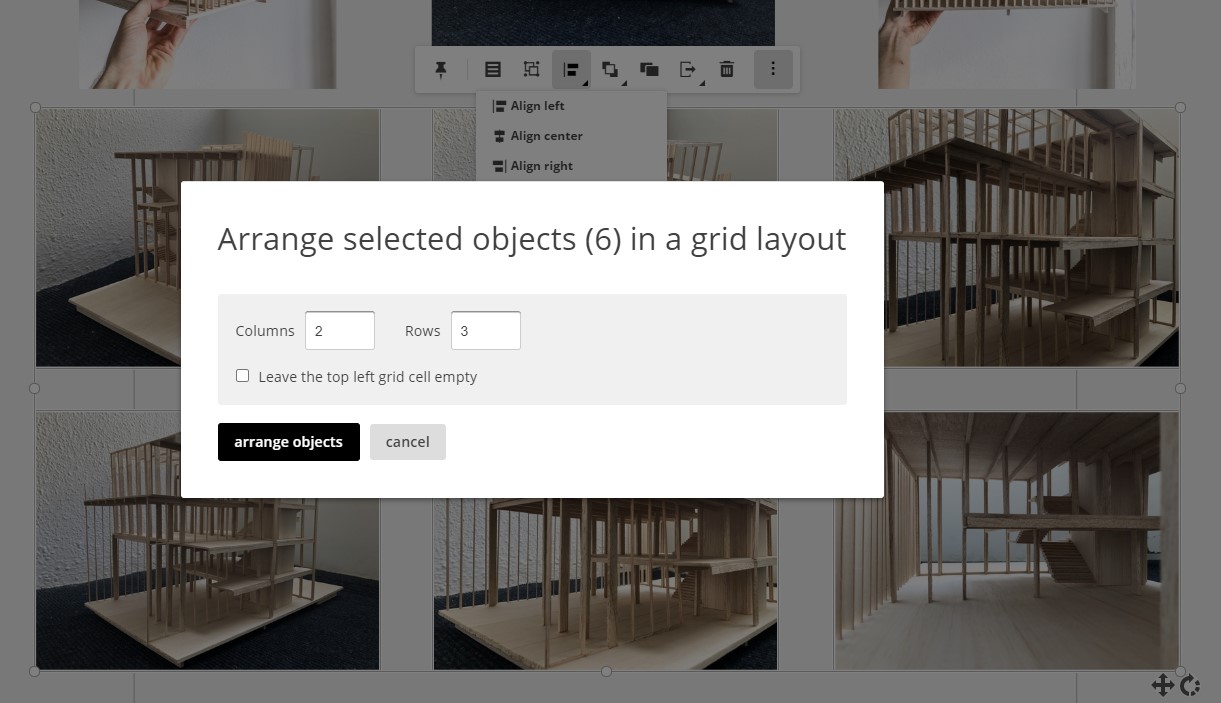
Object Alignment (Grid Layout)
Multiple images can be automatically arranged in a grid. Especially handy when you have a bunch of model photographs. Select the images you want to arrange in a grid and then look for the menu bar. Click on the additional options menu icon (3 vertical dots).
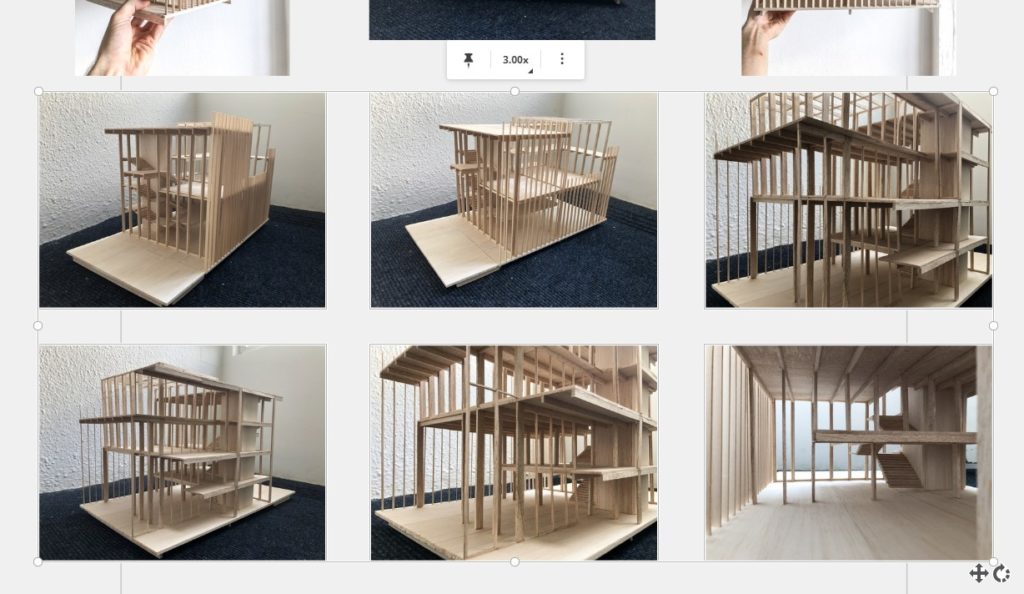
Among the additional options, select “Object Alignment” icon and scroll to the bottom for “Grid layout.”
Enter the number of columns or rows desired. The images will be arranged with equal spacing in between them.
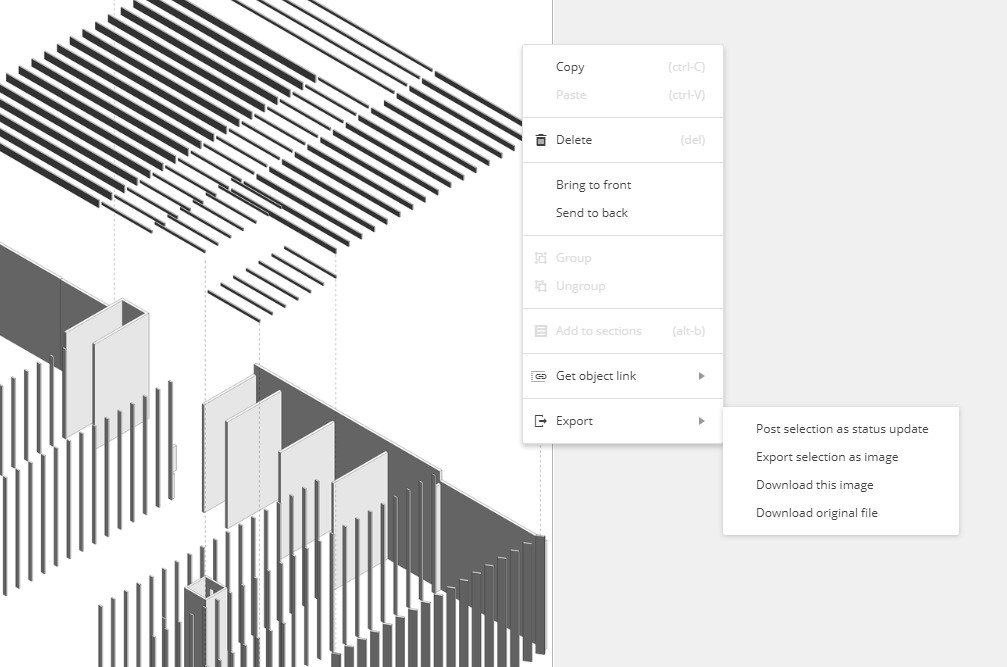
Download Original File
Select an object and right click to see the fly-out menu. Hover over “Export” to select “Download original file.”
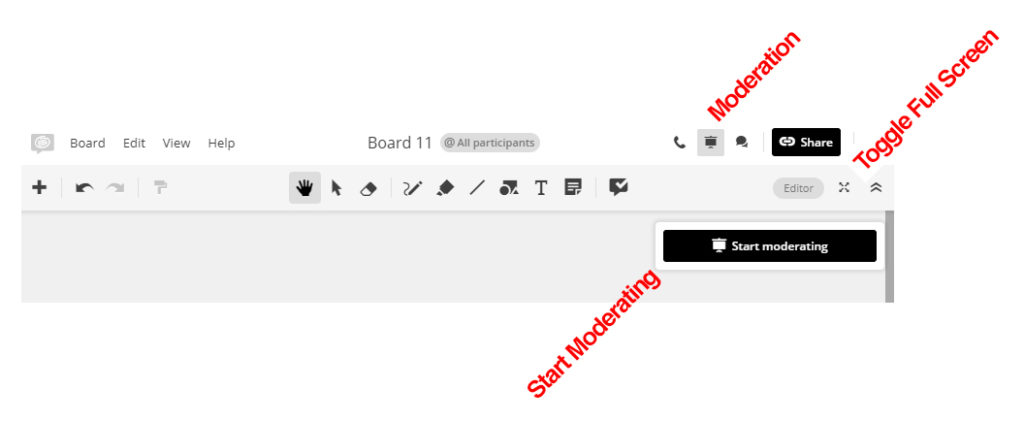
Presenting in Concept Board
During presentations, the presenter can take control of everyone’s screen by clicking on the “Moderation” button which looks like a tiny slide projector screen in the top right corner. Then click the black “Start Moderating” button. The participants will be given the option to follow or leave the moderation.
The presenter can also opt for “full screen” view.
When you are looking for the cursor of a specific participant, click on the participant’s icon (to the top right corner), click, and then select “Find in Board.”